
Table of Contents
There are few things as satisfying as pulling a warm, freshly made tortilla off a skillet. Soft, pliable, and with a whisper of toastiness from the pan, homemade tortillas elevate any meal they touch. Whether you’re wrapping up grilled veggies, scooping into chili, or crafting the perfect taco, these simple flatbreads are endlessly versatile and surprisingly easy to make.
In this article, we’ll explore the beauty of homemade tortillas—their uses, history, variations, and of course, provide you with a foolproof recipe to make your own at home. This guide will not only show you how to make tortillas but inspire you to rethink store-bought options entirely.
A Brief History of the Tortilla
The word “tortilla” comes from the Spanish word for “little cake,” but its origins trace back much further. Corn tortillas have been a staple in Mesoamerican cuisine for over 10,000 years, deeply rooted in the cultures of the Aztec and Mayan civilizations. Wheat tortillas, on the other hand, developed later, around the 16th century, after Spanish colonizers introduced wheat to the Americas. The resulting flour-based flatbread quickly became a key element in Northern Mexican cuisine, and later, Tex-Mex and Southwestern U.S. cooking.
Wheat flour tortillas are the version we’ll be focusing on in this article. These are most commonly used in dishes like burritos, fajitas, quesadillas, and wraps, though their utility reaches far beyond Mexican and Southwestern fare.
Why Make Homemade Tortillas?
While store-bought tortillas may offer convenience, they often contain preservatives and lack the freshness and character of homemade versions. Here’s why you should consider making your own:
- Flavor: Homemade tortillas have a buttery, slightly chewy texture and a warm, nutty flavor from the skillet.
- Texture: They are soft and flexible, perfect for wrapping without cracking.
- Customizability: You can control the ingredients, salt level, and size.
- No Preservatives: Just simple, wholesome pantry ingredients.
- Cost-Effective: Flour, water, and oil cost a fraction of pre-packaged options.
Making tortillas can also become a calming ritual—a way to connect with a simpler, hands-on method of cooking that’s been practiced for generations.
What You Can Do With Homemade Tortillas
The versatility of tortillas is unmatched. Once you master the basic recipe, a world of culinary possibilities opens up:
- Tacos: Fill them with everything from grilled meats and fish to roasted veggies and beans.
- Burritos: Load them up with rice, beans, protein, and cheese, then wrap them into hearty burritos.
- Quesadillas: Layer cheese and fillings between two tortillas and grill until melty.
- Wraps: Use them for lunch wraps with hummus, greens, and sliced meat or tofu.
- Tostadas: Fry or bake them until crispy, then top like an open-faced taco.
- Chips: Cut into wedges, bake or fry, and serve with salsa or guacamole.
- Breakfast Burritos: Fill with eggs, cheese, and veggies for a morning treat.
- Mini Pizzas: Top with sauce, cheese, and veggies, and broil until bubbly.
- Desserts: Sprinkle with cinnamon sugar and toast for a sweet snack.
The tortilla is a true culinary chameleon. Whether you’re cooking for a crowd or just prepping lunch for the week, homemade tortillas add a handmade touch that elevates any dish.
Flour vs. Corn Tortillas
Although corn tortillas have their own unique appeal and are essential in many traditional Mexican dishes, flour tortillas offer a softness and flexibility that works particularly well for larger wraps and heartier fillings.
Corn tortillas require masa harina and have a more rustic, earthy flavor. Flour tortillas, by contrast, are made with basic ingredients found in any pantry and provide a more neutral canvas for a variety of cuisines.
If you’re new to tortilla-making, flour tortillas are a forgiving place to start.
Tips for Perfect Tortillas
- Use Hot Water: Warm water helps the flour absorb liquid more efficiently, leading to a softer dough.
- Let the Dough Rest: Resting the dough allows the gluten to relax, making it easier to roll out.
- Don’t Skip the Preheat: A hot skillet is crucial for those signature brown spots and that slight char.
- Roll Evenly: Uneven dough leads to uneven cooking. Aim for uniform thickness.
- Keep Warm: Store cooked tortillas in a clean kitchen towel to keep them warm and pliable.
Once you get the hang of it, making tortillas will become second nature.
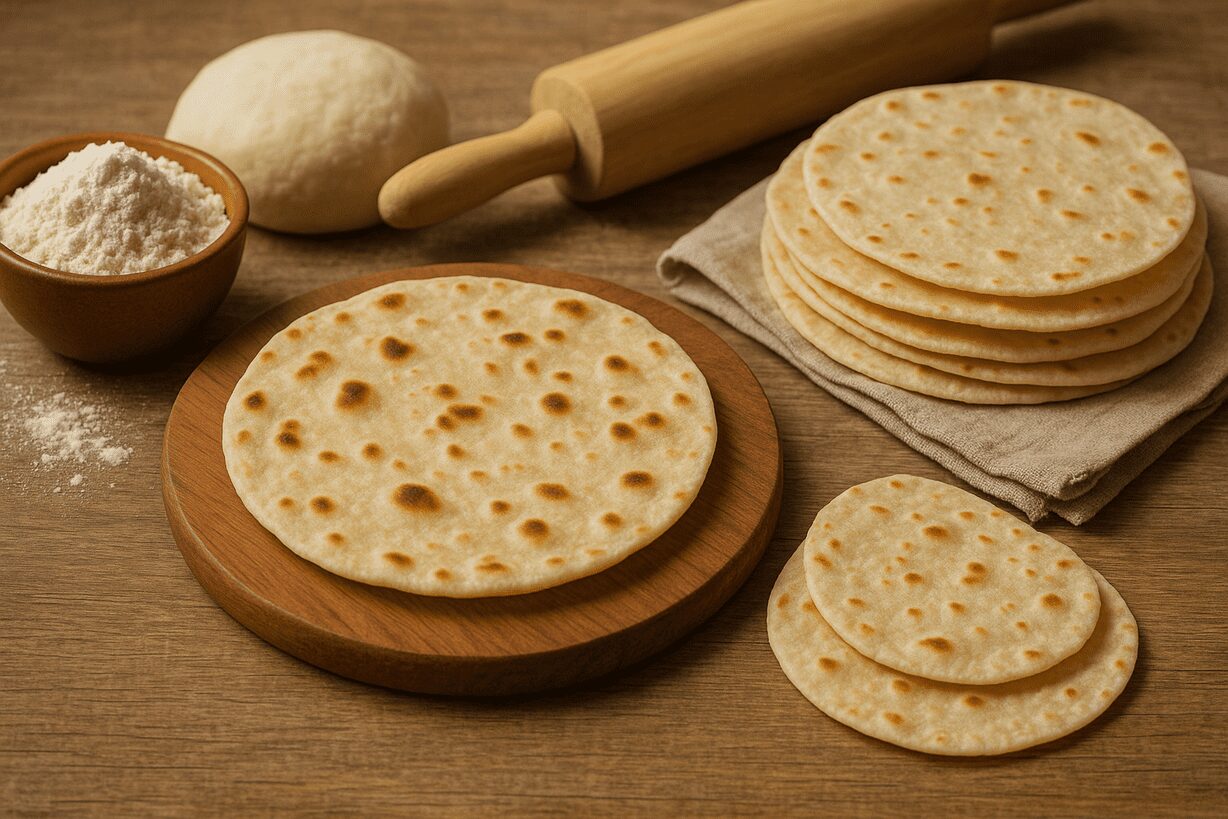
The Recipe: Easy Homemade Flour Tortillas
Makes: 10-12 medium tortillas
Prep Time: 15 minutes
Cook Time: 15 minutes
Total Time: 30 minutes
Ingredients:
- 3 cups all-purpose flour
- 1 teaspoon salt
- 1 teaspoon baking powder
- 1/3 cup vegetable oil (or melted butter/lard for traditional flavor)
- 1 cup warm water (plus more if needed)
Instructions:
- Mix Dry Ingredients:
In a large mixing bowl, combine the flour, salt, and baking powder. Use a whisk or fork to make sure everything is well distributed. - Add Oil:
Drizzle the oil over the dry ingredients. Use your fingers or a pastry cutter to work the oil into the flour until it looks crumbly and resembles coarse sand. - Add Warm Water:
Gradually pour in the warm water, mixing continuously with a fork or your hand until the mixture starts to come together into a sticky dough. If it feels too dry, add a tablespoon of water at a time. If it’s too sticky, sprinkle in a little more flour. - Knead the Dough:
Turn the dough out onto a clean, lightly floured surface. Knead it for about 3 to 5 minutes, pressing it with the heel of your hand and folding it over itself repeatedly, until it becomes smooth and elastic. - Rest the Dough:
Place the kneaded dough back in the bowl and cover it with a clean towel or plastic wrap. Let it rest at room temperature for at least 30 minutes. This helps relax the gluten and makes it easier to roll out. - Divide and Roll:
After resting, divide the dough into 10 to 12 equal portions (you can eyeball it or use a scale for accuracy). Roll each portion into a smooth ball. On a lightly floured surface, use a rolling pin to roll each ball into a flat circle about 6 to 8 inches wide. Try to roll them evenly so they cook uniformly. - Preheat and Cook:
Heat a dry skillet or cast iron pan over medium-high heat until it’s hot (a drop of water should sizzle immediately). Place a rolled-out tortilla onto the skillet. Cook for about 30 to 60 seconds on the first side, until you see bubbles and golden brown spots. Flip and cook the other side for another 30 to 45 seconds. - Stack and Cover:
As each tortilla finishes cooking, transfer it to a plate lined with a clean kitchen towel. Stack them as you go and keep them wrapped in the towel to stay warm and soft. - Serve and Store:
Serve warm, or let them cool completely before storing in a sealed bag or container. They stay fresh at room temperature for a couple of days or can be refrigerated or frozen for longer storage.
Storing and Reheating
Homemade tortillas are best fresh, but they can be stored:
- At Room Temperature: Up to 2 days in a sealed bag.
- In the Refrigerator: Up to 1 week.
- Frozen: Stack with parchment paper between each tortilla and freeze in a zip-top bag.
To reheat, use a dry skillet or microwave with a damp paper towel to prevent drying out.
Conclusion: A Worthy Kitchen Skill
Making homemade flour tortillas is one of those culinary skills that pays off instantly and keeps on giving. With just a few simple ingredients and a bit of practice, you can enjoy warm, fresh, flexible tortillas any time.
Whether you’re hosting a taco night, meal-prepping for the week, or just craving something warm and satisfying, these tortillas deliver. The satisfaction of watching them puff up in the pan and tasting that fresh, toasty flavor is unmatched.
So the next time you think about reaching for the store-bought pack, remember: the best tortillas come from your own kitchen.
More from The Daily Mesh:
- The Floating City of Venice: An Upside-Down Forrest
- Spain and Portugal Blackout April 2025: A Comprehensive Analysis of the Iberian Power Crisis
- Cinco de Mayo 2025: History, Significance, and Modern-Day Celebrations